A couple of years back I suffered with Labyrinthitis. I had terrible bouts of vertigo and felt quite ill for a few weeks. Since then I haven't had any vertigo incidents but I do get the odd dizzy/spacey spell where I just don't feel myself. It affects how I move and I get a slight headache. Sometimes it is down to just not getting enough sleep. Other times it is a complete mystery, especially when I have felt fine and dandy the day before.
Today is one of those days of feeling spacey. I look around and my vision feels off and I occasionally stumble. It is not fun at all so I've had a nice long rest and now getting back into the tasks of the day. First things first is to share the rest of the cake I made for my friends birthday.
As I said in my previous post, I just love the chalkboard inspired crafts that have popped up everywhere. I didn't want to cover the cake completely in fondant so opted for a fondant chalkboard plaque surrounded by fondant and buttercream details.
I use Pic Monkey a lot for editing my pictures and for creating new designs. I purchased the Royal version and it is really worth the money. I created a plaque design using their label overlay tool and fonts. I fiddled with the size for printing in Picasa and produced a design I could use as a template and for copying.
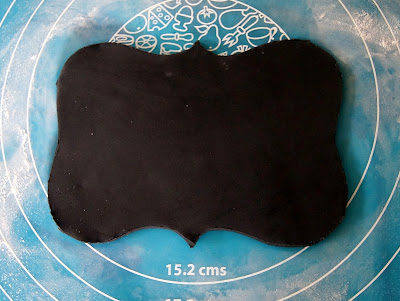
I laid the shape over some rolled out fondant so that I could cut the design neatly.
I then took a large brush and some icing sugar and began dusting the plaque. I loaded the brush with icing sugar and flicked this over the plaque as well as brushing parts with icing sugar. I built this up slowly. Quite frankly after the cake was finished I believe even more sugar could have been applied.
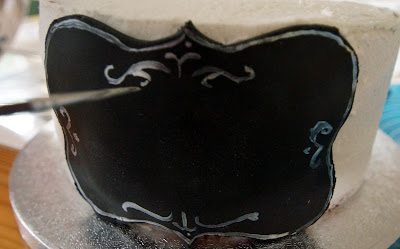
I had some white pearl paint, and with a small brush I began to draw an outline around the edge of the plaque. After I did this part I attached the plaque to the cake to continue the design.
I had iced the cake the day before and popped it in the fridge so that it would be easy to work with the next day.
It's not a super smooth finish but the picture makes it look worse than it actually did in real life!
I attached the plaque with some fresh frosting which I spread over the side of the cake.
I then continued to paint the design freehand on the side of the cake. I tried to brush gentle strokes to make it look more like chalk on a board.
In the light you can see the pearl effect but up close it looked more flat.
I then began to attach the flowers to the cake. I secured them with a little frosting on the back.
I liked over laying the flowers and bringing them onto the plaque.
The large flowers were a little tricky but to stayed put!
I built up the design on top of the cake starting with my large hydrangea look flower ball.
I added buttercream leaves to the flowers for a more realistic affect and to fill in the gaps between the flowers.
I had intended to leave the back of the cake plain but I just can't leave things alone! In this case I think adding the flower border was just right. I used a flower tip and piped lilac flowers at the base and edge of the cake. I left them plain rather than adding middles to keep things simple.
Here you can see how much the border blends in with the rest of the cake. It ended up being so feminine and pretty, I just loved it. That is rare for me to say that about my own cakes!
Have you made any chalkboard art? Share on my Facebook page!
Have a great weekend!


No comments:
Post a Comment