Thursday 26 February 2015

Rustic Jute covered Vase for Spring


Urgh the weather is just miserable! It's almost March, we can hope for some actual Spring weather now right? All my attention lately is on Spring colours, light clothes, Easter, Mother's Day and getting out in the garden. Anything to take my mind off the damp, overcast days.

All the things I have been making have a definite Spring flavour about them. If the weather can't cheer up at least my home can!

Over the years I have accumulated a lot of vases, either gifts or items I have bought. Some of them are, well, a little boring. Sometimes a plain vase is a good thing when you have a huge bouquet of beautiful blooms to display. Other times it seems like an opportunity to make something truly unique. This is what I felt when I looked at this old vase of mine.


It's a fairly unusual shape, being so wide at the top but I rarely used it. I prefered the coloured vases I own or the more delicate one bud style vases.

I've seen all these jute covered wine bottles and jars over on Pinterest. I just love the way they look and thought it would be a nice change for this vase!

Armed with my glue gun I started at the base of the vase and wound the jute string around the bottom securing with hot glue every so often.


I didn't need to use glue all over, just in a few places to hold the string in place.


I found that as I reached the narrower part of the vase, the less glue was needed. A little was needed to secure the string to the top of the vase.


Some other bloggers have left the vases as is, and they do look lovely with flowers placed in them but I am not a minimalist type girl!

I decided to paint the string at the base in a cream colour to create a colour block effect. I had also seen this on a few jars over on Pinterest. I used some tape to section off the bottom which enabled me to have a defined line.


But I was still not done! I had some of the wooden hearts left over from other projects and hot glued a medium sized one to the front. I finished it off with some cream lace ribbon at the top, also secured with a little hot glue. I at least kept things neutral!


I was given some lovely flowers by another Mum for looking out for her son. It was a lovely surprise and very unexpected and perfect timing for christening my newly updated vase!

It goes so well with my house lamp.

Even the cat agrees!

Would you update a vase this way?

Hop over to Facebook and share!


Monday 23 February 2015

Something Old, Something New, Bedroom Decor


I have such a thing for the colour teal, my house is covered in it! It creates a bright space when the sun shines on it and warms up the place in the dead of Winter.

I have always been drawn to bright colours, neutral has never been my thing. Our first house was a rainbow of colours from yellow, orange, purple and of course teal. That was just the walls!

I have reigned myself in since moving to our current home and restrict the colours to the bits and pieces I buy rather than covering the walls in a full palette of colour. That doesn't mean that the house is lacking in colour, far from it!

While I have a bold and deep shade of teal for our living space, I prefer a more muted and light shade for the bedroom. I have taken inspiration from my bedding and the various cushions I have collected over the years to determine the shade and tone. 


I have two beautiful bedding sets from Matthew Williamson's Butterfly range from Debenhams. One set features peacocks and muted hints of blue and teal, while the one above is bolder with accents of pink nestled in the cool blues and teals.


This butterfly cushion was a gift from my Mother many years ago and now sits proudly on the bed. It adds just the right pop of pink to break up the teal.

Another reason for tying everything together is that with all the things I have been given and collected, I just have too many mis matched pieces. While I am not the sort of person to want everything co-ordinated there was just something messy looking about the master bedroom.

My husband suffers quite a bit with sinus problems due to having asthma, colds just go straight to his sinuses and he is forever looking for tissues of any kind!

Naturally I decided that we needed a tissue holder. Couldn't just go and buy a nice box of tissues, I have to custom make one!

You can get all sorts of mache items these days and they are great basics for adding a personal touch to.


This is a basic tissue holder just begging to be turned into something pretty!

I used 2 coats of the DecoArt Spa Blue paint to cover the box completely. 


As you would have seen on Pinterest, there are various tutorials for letter transfers onto wood, canvas, etc. I found this one by Come Together Kids which is quick and easy.

Firstly print off the lettering you want, I did mine backwards.


Next scribble all over the letters with a pencil.


Place this onto the item you wish to have the lettering and trace the letters on the other side of the paper.


When you take the paper away you will have an outline of the letters you just traced.


Now you are free to paint!


I chose a pink to match the pillow and bedding set. When I had added the paint, I went over it a second time.


A much better result than if I had drawn this freehand!

It now has pride of place on my husband's side of the bed. Much to his dismay I have added a little paper flower to the top! He feels he needs to watch the Die Hard movies to regain some masculinity! 


I have no idea what he means!

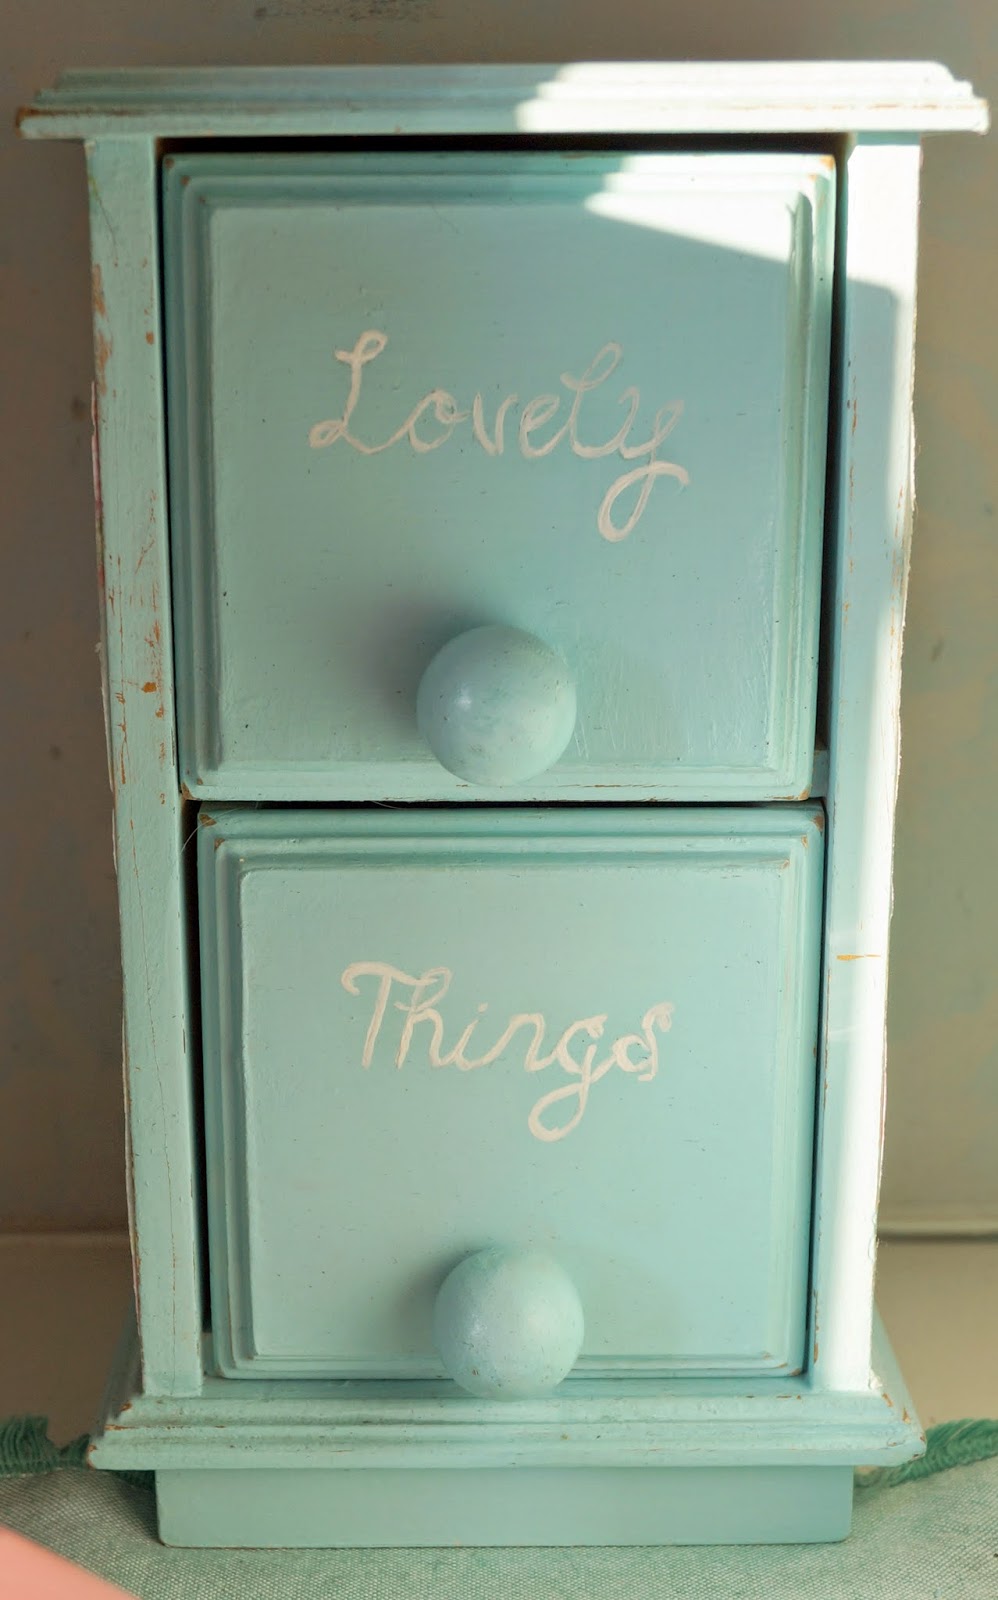
I had this jewellery box given to me years ago. It's something old but has proved a very useful piece.


I have always liked the painted cats on the front but it just doesn't fit with anything now. I gave it a light sand all over and painted it in DecoArt Spa Blue which has become my go to shade for the bedroom. It took 2 coats to cover it completely.


I saw this Decopatch paper and loved how much it blended with my bedding and the paint. I applied this with Mod Podge to the sides of the jewellery box and covered it with a coat of Mod Podge to seal and to give it a glossy finish. Once this was completely dry I lightly sanded the sides and edges to give it a worn and vintage feel.


Finally I used the same technique as for the tissue box and painted 'Lovely Things' onto the front.

Although it was lovely to start with I am loving it's transformation!

Have you used this transfer technique? Share your creations on my Facebook page!


Friday 20 February 2015

Mocha Cupcakes with Coffee Buttercream

Well this week has really gone fast! Half term holiday for the kids and we have packed in a lot! Can't believe it's Friday already and they will be back to school Monday. We have had a lot of fun, spending quality time together as well as apart.

The weather was glorious at the start of the week, cool, but full of sunshine. Sadly the latter half of the week has been miserable and raining, but it hasn't stopped the fun.

We are taking it easy today, just hanging out, so I can tell you guys all about this excellent cake recipe I have been using for years and how I altered it to make these tasty Mocha cupcakes!

When my son was small he wanted a dragon as his birthday cake from a book he saw in a shop. It looked really tricky and I had no idea how I was going to make it but of course I didn't want to disappoint him! I was always on the AllRecipes.com site, so off I went in search of a good chocolate cake. I came across this recipe by chance and I am so glad I did as it makes a lovely big, moist, devils food style cake that just has you going back for another piece!


MOCHA CUPCAKES
Adapted from Dark Chocolate cake recipe found here.
(makes 12)

INGREDIENTS

1 cup boiling water
1/2 cup cocoa powder
1 1/3 cups plain flour
1 tsp baking soda
1/4 tsp baking powder
1/4 tsp salt
1/2 cup softened butter
1 cup sugar (I've used granulated and caster)
2 eggs
1 tsp coffee extract (or more to taste)

METHOD

Preheat oven to 180'C and line a cupcake tray with 12 liners.
In a bowl pour boiling water over cocoa powder and whisk until mixed and smooth. Set this aside to cool.
Mix together flour, baking soda, baking powder and salt in a bowl and set aside,
In another bowl cream the butter and sugar until light and fluffy. Beat in eggs one at a time and then add the coffee extract. Add the flour alternately with the cocoa mixture (I did about 3 rounds of this). Fill the cupcake liners just under 2/3rds full and bake in the oven for about 15-20 minutes. The cakes are done when they spring back when touched and a toothpick inserted in the middle comes out clear. Set these aside to cool while you make the buttercream.

COFFEE BUTTERCREAM
Adapted from Chocolate Cake Mix Doctor book (can be purchased here)

1/4 cup milk (use whichever type you prefer, I used semi skimmed)
2 tbs instant coffee
6 tbs Trex or other white shortening
4 cups icing sugar

METHOD

Warm up the milk in the microwave for about 30 seconds. Add instant coffee to the milk and mix until the coffee dissolves. Set aside to cool.
Using a mixer (I used a Kitchen Aid) blend the Trex until slightly fluffy. Add 1 cup of the icing sugar and mix in well. Next alternate the coffee mixture with another cup of icing sugar blending each time until smooth. I found that 4 cups made quite a stiff buttercream so you can add a little more milk or water to thin it out a little. I chose not to thin mine out, but would again for piping purposes.

Frost your cupcakes with the buttercream anyway you like, however, I am sharing how I did mine. Very easy especially if you use a disposable decorating bag. I recommend the Wilton bags. I had some others and they were just awful. They split all the time, when you tore them apart they would rip away from the join. I gave up with them eventually and threw the rest in the bin!


You will need one decorating bag (in theory!) and a star tip, I used Wilton star tip #21.
Fill your bag half way with frosting and attach the star tip. Starting at the edge of a cupcake, hold the bag straight up with the tip just touching the cupcake. Begin applying pressure and swirl your icing around the starting point to form a rosette.


Continue this method around the edge of the cupcake,


When you have finished the edge, move into the middle and continue with the rosettes until the cupcake is completely covered. You can overlap these to fill all the gaps. Top with some chocolate covered coffee beans if liked.


This takes no time at all. I frosted all 12 cupcakes in about 20 minutes if that!

Enjoy!


Wednesday 18 February 2015

Vanity Mirror makeover


Sorry for the radio silence but it's half term week here which means we have been busy busy! I am having a breather today however, and wanted to show you some of the things I have been making for my master bedroom.

Initially I was going to paint the bedroom, buy rugs, make over some items and clean the existing furniture. Some of that idea has now been scrapped, mainly the part about keeping the existing furniture! Having lived with it for 7 years we have decided it is time for a change and plans are afoot to change, alter the layout and bring the bedroom bang up to date! I am still keeping some of my initial ideas about colours and altering exisiting decor to fit the new bedroom.

I want a tranquil, peaceful room, with neutral walls and furniture with hints of pale teal/turquoise, pink and cream in the decor. This way we can switch these elements out while keeping the base neutral.

One item that looked very out of place even with the current furniture was my vanity mirror. It was a dark wood stained piece which I have had for years. I like the shape and the fact it is free standing so can be placed anywhere but just couldn't stand the stain.


See it's pretty ugly that even the camera didn't want to focus on it!

The mirror is held into the frame like a photo frame, so was easy to remove. I set to work on cleaning and sanding the frame ready for painting.


Yes I did take these photos in front of the TV and yes I was catching up with Scandal!

After sanding the frame, I wiped it down fully and began painting with an acrylic paint that I have been using for all my made over decor objects.


First coat and still the frame is too ugly for the camera to focus!!


The frame took about 3 coats for good coverage. I didn't want to slap the paint on in heavy coats, rather build up the colour.


I really don't know what happened here as it's now pretty!

I finished off the mirror by adding a clear varnish. This gave it a nice gloss finish and will help to protect the paint. I did think about distressing the edges but decided to leave it alone. I think it is pretty this way.


Here it is sitting proudly on my dresser with some other items I have made over.


This glass cube was easy to update by hot gluing ribbon and resin flowers to the front and adding beans to the inside which I had spray painted a co-ordinating colour.

I also made over a small jewellrey box which I will share on a later post.


Have a great day!


Thursday 12 February 2015

Neapolitan Cookies

So we are having fondue on Valentine's Day. Yes it is very 70's as is the book I own but there is something so decadent and fun about fondue. Naturally I am making a chocolate fondue and having the usual things to dip in it, like strawberries, grapes and marshmallows, but I wanted to have something else, like cake or cookies. This gave me the perfect excuse to try out a new recipe.

My husband fancied some shortbread but I didn't have many ingredients to hand, so I went looking for a simple recipe and found this one by the Comfort of Cooking. I have made these cookies twice, once following the recipe as it stands and secondly adding spices to create Christmas cookies. After having a play with some spices I knew I would want to doctor the recipe further to create different flavour combinations. The other thing that has me returning to this recipe is the fact that the cookies hardly spread during cooking. They hold their shape beautifully. Another thing is that they don't use any eggs, so if you enjoy a little bit of cookie dough, you can go right ahead and scoff it!

I've seen on Pinterest many Neapolitan style desserts and it was this style of ice cream, along with raspberry ripple, that were my favourites as a child. 

Combining the 2 ice cream flavour ideas, I came up with these simple Neapolitan cookies. I wanted to make mini cookies for the fondue but also wanted to have a play with decorating larger cookies.


Lovely little tasty bites!

Not too thick, perfect for dipping!


Ready for the recipe?

I have followed the original recipe in it's entirety and it is reproduced here along with the additions I made.

The original recipe yields 15 cookies. As I wanted to make mini ones, this recipe made 27 mini cookies and 6 large. I would say the recipe would make between 25 to 35 mini cookies depending on whether you make large ones too.

Neapolitan Cookies

Ingredients

1 cup butter softened (I used Olive spread which is pretty soft to begin with)
1/2 cup Icing sugar
2 cups Plain flour
1/2 tsp Vanilla Bean Paste or 1 tsp of Vanilla extract
1 tsp of Raspberry or Strawberry extract (I used raspberry)
1 Tbs Cocoa Powder
Extra icing sugar as needed.

Method

Preheat oven to 180'C. Line at least 2 baking trays with greaseproof paper.
Cream together the butter and icing in a bowl.
Add flour and continue to work it until it forms a ball of dough.
Split the dough into 3 equal pieces.


To the first ball of dough, add the Vanilla bean paste. Work it into the dough until it is fully incorporated. Place dough in bowl and add a small amount of icing sugar and knead into the ball. The paste makes the dough a little sticky so this ensures that the ball will be easy to roll.

Take the second ball of dough and add the Raspberry extract. Do the same as with the Vanilla dough but also add some pink food colouring to get a nice colour for your dough. I used Wilton Rose colour.

Take the final ball and place in a bowl. Add the cocoa powder and work into the dough. This took the longest and you may find you do not need as much as a tablespoon of cocoa. This dough will be a little drier than the others but it bakes the same way.


Your dough is ready for rolling out. You can use any shape cookie cutter you want, these are not restricted to Valentines!


These are Wilton cookie cutters and measure 2 inch across and 3 1/2 inch across.

Roll out your dough and cut your cookies out! The original recipe states 1/4 inch thick. I just went with my best judgement!


Use plenty or icing sugar or flour on your board and rolling pin to stop the cookies from sticking. If they do stick, a small spatula can be used to help them up!

Space them out on the baking trays and place in the oven for 12 - 18 minutes. Be careful if you make mini cookies as they can get over baked quickly. You want to see a small browning on the Vanilla cookies.


Once baked, cool completely before decorating, if liked.


I can't wait to dip these beauties into chocolate!! Another thing you can do with these is dip them in chocolate and let them set for a chocolate covered treat anytime!


I did decide to decorate the larger cookies though for an anytime treat.

I took some different coloured fondant, rolled it out, used the heart cookie cutter to cut out a shape, painted on some clear alcohol (or edible glue) onto the cookie and gently pressed the fondant on top. I then used an edible food writer to write messages on them just like Love Hearts!

They are a lot brighter than Love Hearts and resemble the American Conversation Hearts more.


I can tell you they taste delicious!!

I hope you have a great day Saturday, no matter what you do!


Thanks for following and reading!