
I wasn't planning to do anymore Christmas cake posts this year until I got news that cakes were wanted for the school fair. I think it's always nice to theme them when I can and I had toyed with the idea of making a cupcake wreath for a while. My main sources of inspiration came from these pins here, here and here. I knew that I had limited space so scale wise I had to ignore how elaborate the original ideas were. I am a traditionalist when it comes to colours for Christmas, so pink is never something I would do, but I really liked the idea of holly leaves over other Christmas shapes. I also really liked the idea of the bow on 2 of the pictures and swirled frosting.
I made chocolate cupcakes from The Hummingbird Bakery and used their basic vanilla frosting recipe for the base for my peppermint flavour.
I made chocolate cupcakes from The Hummingbird Bakery and used their basic vanilla frosting recipe for the base for my peppermint flavour.
I always use Trex in my frostings as it's a lot stiffer than butter/margarine and, being white, it means that my frosting is always white ready for perfect tinting. I don't like the yellow tinge you get when using other fats. I also find the taste is really good and never too sweet (unless you are making almong frosting, then watch out!).

Trex is essentially lard, which sounds gross, but when paired with icing sugar and flavourings, makes a great frosting!
I did a 3/4 batch for my cupcakes which meant I had a little left over, but half would not be enough. I'll just have to frost a few cookies that are lurking in the cupboard!
This is my adapted recipe from the Hummingbird Bakery for a 3/4 batch.
180g Icing sugar
60g Trex
1 1/2 tsp peppermint extract (can use a bit less if you like just a hint)
Splash of milk.
Mix the icing sugar and Trex together, it will form bread like crumbs. Add in a splash of milk and flavouring, keep mixing. Add a little more milk until you get a smooth well mixed consistency.
I always use paste colours to tint my frosting as they never thin the frosting out. For deeper colours like red, I tend to start with small batches of frosting to ensure a nice deep colour. Too much frosting means you end up with a light shade. I also add a little, mix, then more until I find the right shade. The colours do deepen after a while so long as they are not set in direct sunlight.
I like the Wilton paste colours as they are easy to use and last a long time.
For this frosting I have used the Kelly Green shade.

I always use a toothpick to add the colour to the frosting. This means you can add as little or as much as you need easily. For this rich green I added 3 toothpicks worth of paste colour.

I filled a disposable bag with the frosting and added Wilton tip 2D to frost swirls or roses onto the cupcakes.
 Yummy cupcakes, primed and ready for frosting!

Such an easy and cute way to frost! Start in the middle and swirl the frosting around to the edge. In other colours like pink, they look like roses.
I have some old cookie cutters from my childhood, a tree, Santa and some holly. The holly has come in handy a couple of times when I've needed fondant holly leaves.

Urm, must remember to take pictures before using!
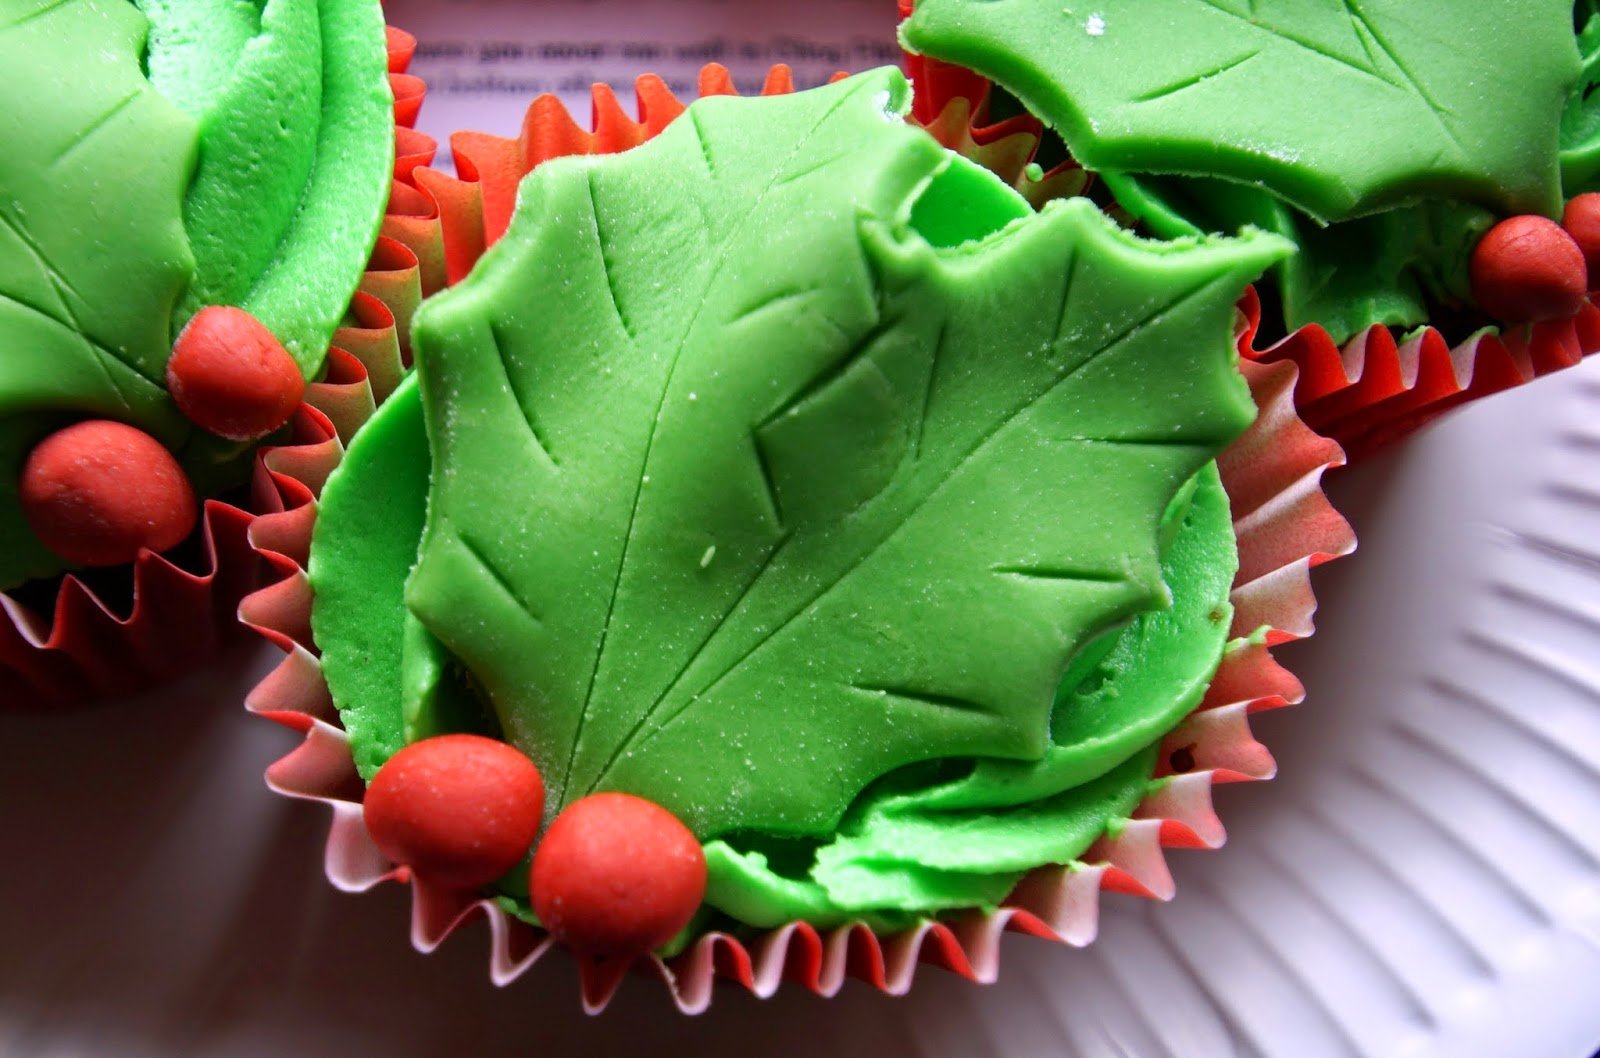
I cut seven holly leaves out of some green fondant. The embossing on the cutter didn't go through to the fondant, so I just drew the lines in myself. I then got some red fondant and rolled small balls for the berries.

I then arranged these on the cupcakes to resemble a wreath, slightly overlapping a couple of them, then I just attached the berries to the base of the leaves.
 I left the top one blank for the bow.
Looking festive already!
The bow was a little tricky and I actually made the parts of the bow before I decorated with the holly leaves so it had a little time to dry out. I found this round up of bow tutorials on Pinterest here. It's mainly just pictures but pretty self explanatory.
First I rolled out and cut the shapes I needed for the bow from red fondant.

I didn't roll them out too thinly so they were fairly easy to handle, but if anyone can tell me how I can stop sticking my fingernails into my nicely formed fondant shapes let me know!!
I folded the 2 larger rectangles and pinched one end to form the crease of the bow. As per the tutorial, I stuffed the hole with some paper towel to stop them from collapsing. I bent the tails of the bow to give them some shape and left them to dry for a few minutes while I prepped the rest of the design.

I pinched the ends of the tails as well so that they could easily be placed under the main part of the bow.

I placed the tails first, then wrapped the smaller rectangle around the bow loops and attached them to the top cupcake. I felt the bow looked a little dull so spruced it up with some edible lustre dust, I also used this on the berries and green lustre dust on the leaves. From preparing, to baking to decorating, the cakes took me 2 hours. Simple and easy when you need something festive in a hurry!


Happy baking!
Such an easy and cute way to frost! Start in the middle and swirl the frosting around to the edge. In other colours like pink, they look like roses.
I have some old cookie cutters from my childhood, a tree, Santa and some holly. The holly has come in handy a couple of times when I've needed fondant holly leaves.
Urm, must remember to take pictures before using!
I cut seven holly leaves out of some green fondant. The embossing on the cutter didn't go through to the fondant, so I just drew the lines in myself. I then got some red fondant and rolled small balls for the berries.
I then arranged these on the cupcakes to resemble a wreath, slightly overlapping a couple of them, then I just attached the berries to the base of the leaves.
Looking festive already!
The bow was a little tricky and I actually made the parts of the bow before I decorated with the holly leaves so it had a little time to dry out. I found this round up of bow tutorials on Pinterest here. It's mainly just pictures but pretty self explanatory.
First I rolled out and cut the shapes I needed for the bow from red fondant.
I didn't roll them out too thinly so they were fairly easy to handle, but if anyone can tell me how I can stop sticking my fingernails into my nicely formed fondant shapes let me know!!
I folded the 2 larger rectangles and pinched one end to form the crease of the bow. As per the tutorial, I stuffed the hole with some paper towel to stop them from collapsing. I bent the tails of the bow to give them some shape and left them to dry for a few minutes while I prepped the rest of the design.
I pinched the ends of the tails as well so that they could easily be placed under the main part of the bow.
I placed the tails first, then wrapped the smaller rectangle around the bow loops and attached them to the top cupcake. I felt the bow looked a little dull so spruced it up with some edible lustre dust, I also used this on the berries and green lustre dust on the leaves. From preparing, to baking to decorating, the cakes took me 2 hours. Simple and easy when you need something festive in a hurry!
Happy baking!
No comments:
Post a Comment